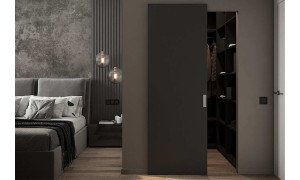
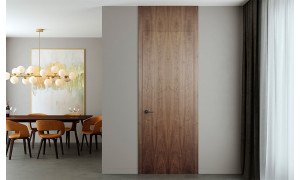
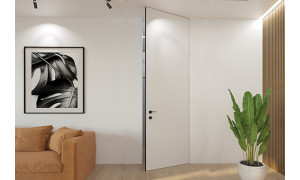
Renovation is always a test of patience, and the final stages often turn out to be the most difficult because they shape the overall impression of the entire space. You can invest in an elegant and stylish door leaf, but all of that value may be lost if the installation is done poorly. Only professional and well-planned interior door installation can deliver the result homeowners actually want: no squeaking, no rubbing, and a door that closes smoothly with the light movement of one hand. If you are currently looking for the right solution for your home, it is worth exploring the selection at TrioDoors, where modern systems are available for different interior styles and technical requirements.
The installation process is never just a matter of fixing the frame and walking away. It is a detailed technical task that requires an understanding of materials, geometry, and adjustment. The opening must be perfectly aligned, otherwise the door may begin to jam, sag, or close incorrectly. Every detail matters, from the choice of hinges to millimeter-precise calibration. Even if you do not plan to install the door yourself, understanding the process will help you communicate clearly with contractors and control the quality of the work on site.
Preparation and Accurate Measurement: The Foundation of Success
.png)
Everything starts with routine but essential measurements. One of the most common mistakes happens when a door is ordered first and the finished flooring is installed later, leaving insufficient height clearance. Another problem appears when the walls or floor are not properly leveled before installation begins. The right approach is to measure width and height in at least three different points. The geometry of the opening should be as precise as possible, and all wall irregularities should be corrected before the door frame is installed.
It is also important to leave a proper technical gap for монтаж foam. This space helps fix the frame securely and contributes to better sound reduction. Accurate measurement at this stage affects every other step that follows, including frame assembly, hinge placement, and hardware alignment.
Assembling the Door Frame and Preparing the Components
The next step is assembling the frame itself. At this stage, there is no room for rushing. Every element must fit the others perfectly and meet at the correct angle. Accurate preparation of all components is one of the key factors that determines how stable and durable the final system will be.
Main steps during frame assembly include:
- Checking the length of the vertical jambs depending on whether a threshold is included or not.
- Connecting the frame elements using appropriate screws or fasteners.
- Cutting in the hardware. Each hinge must be recessed to an exact depth so the door leaf sits tightly without friction.
If the parts do not come with factory-made cuts, a miter saw is usually needed for clean trimming without damaging the finish. After mechanical work is completed, the surface of the components should always be inspected again to make sure the decorative coating remains intact. This becomes even more important when installing premium interior doors with painted, veneered, or other refined finishes.
Working with the Level: Positioning the Frame in the Opening
Once the frame has been assembled, the most critical moment begins: it has to be positioned inside the opening so that it stands firmly and perfectly level. Even a slight deviation can cause the door to open on its own or close unevenly. A good laser level or spirit level is essential for checking both vertical and horizontal lines.
Temporary fixation is usually done with wooden or plastic wedges. These help keep the frame in the correct position while fixing screws are driven through the jamb and into the wall. After the frame is secured, it is necessary to recheck alignment on every axis before the door leaf is hung.
This step is especially important when the project includes modern systems such as concealed doors, because flush designs require even greater installation accuracy for the final result to look clean and seamless.
Hanging the Door Leaf and Adjusting the Hardware
After the frame is fixed in place, all axes should be checked one more time before hanging the door leaf. At that point, the leaf can be carefully mounted onto the installed hinges. If you have chosen hidden hinges, it is important to remember that they often require adjustment in three planes in order to achieve the correct pressure and alignment. The goal is to create an even gap between the leaf and the frame on all sides.
During the final inspection, pay attention to the following:
- Smooth movement. The door should operate without effort and without squeaking.
- Uniform gaps. The standard technical clearance is usually around 2–3 mm.
- Lock performance. The latch should enter the strike plate smoothly, without forcing the leaf.
- No wobble. In the closed position, the leaf should remain stable and secure.
Properly selected and installed door handles also play an important role here, because comfort in daily use depends not only on the hinges and the lock but also on how the hardware feels and functions over time.
Sealing and the Final Finishing Stage
Once the mechanical part of the work is complete, the space between the frame and the wall is filled with installation foam. It is important to use a low-expansion foam so that the frame does not become distorted as the material cures. After complete polymerization, trims or finishing elements are installed to cover the technical seams and complete the opening visually.
For additional comfort, sealing should never be overlooked. A high-quality rubber or silicone seal around the perimeter of the frame performs several important functions at once:
- it ensures quieter closing;
- it improves sound insulation;
- it helps limit drafts and unwanted odors, which is especially useful near kitchens and bathrooms.
When fitting is done correctly, the door performs not only a decorative role but also an important protective and insulating function. This is also one of the reasons why homeowners increasingly pay attention to compatible components such as sliding hardware and modern accessories during the planning stage.
Care Tips After Installation
After all work is finished, it is a good idea to allow the system a little time to settle naturally. During the first weeks, wood-based components may react slightly to changes in humidity, which means the hinges may need a minor readjustment. Hardware should also be lubricated periodically to keep movement smooth and silent over the years.
A professional approach always saves time, stress, and unexpected repair costs. Correct leveling is the foundation of the whole installation. Quality products, reliable frame geometry, and careful adjustment make the difference between a door that simply exists in the opening and one that works flawlessly every single day. If you want a system that combines style, comfort, and dependable performance, TrioDoors offers a wide range of modern solutions together with installation support and related products, including interior doors, concealed systems, sliding options, and accessories. :contentReference[oaicite:1]{index=1}